
国内的技术方法多多少少有点问题,我在国外的论坛找到了办法
Ok. Solved the problem with the help of @martennis answer, but with a little correction.
Every things perfect, just to take care is, we need to enter following command in Package Manager Console:
Install-Package Microsoft.AspNet.WebApi.Cors –IncludePrerelease
Instead of the one shown in the link provided by, @martennis, and after that, my WebApiConfig.cswas updated as follows:
using System;
using System.Collections.Generic;
using System.Linq;
using System.Web.Http;
using System.Web.Http.Cors;

namespace WebApiRESTfulwithJSON
{
    public static class WebApiConfig
    {
        public static void Register(HttpConfiguration config)
        {
            // Web API configuration and services
            var cors = new EnableCorsAttribute("*", "*", "*");
            config.EnableCors(cors);

            // Web API routes
            config.MapHttpAttributeRoutes();

            config.Routes.MapHttpRoute(
                name: "DefaultApi",
                routeTemplate: "api/{controller}/{id}",
                defaults: new { id = RouteParameter.Optional }
            );
        }
    }
}
Hence, solved the problem...!!!
Now, I will able to use my web services from anywhere, calling it from mobile applications, web applications or desktop applications.
For, how to create them from scratch, I wrote my first blog on this (...inspite of being android developer, never tried to write a blog for Android :-P Anyways...)
cors的原理:
{Content=newStringContent("POST: Test message")};}publicHttpResponseMessagePut(){returnnewHttpResponseMessage(){Content=newStringContent("PUT: Test message")};}}}
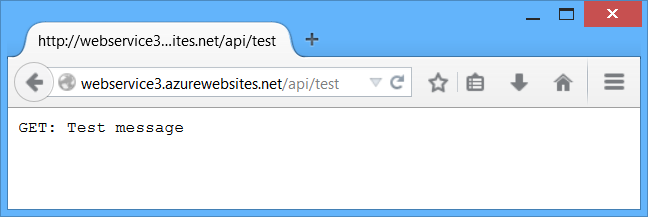
You can run the application locally or deploy to Azure. (For the screenshots in this tutorial, I deployed to Azure App Service Web Apps.) To verify that the web API is working, navigate to http://hostname/api/test/, where hostname is the domain where you deployed the application. You should see the response text, "GET: Test Message".
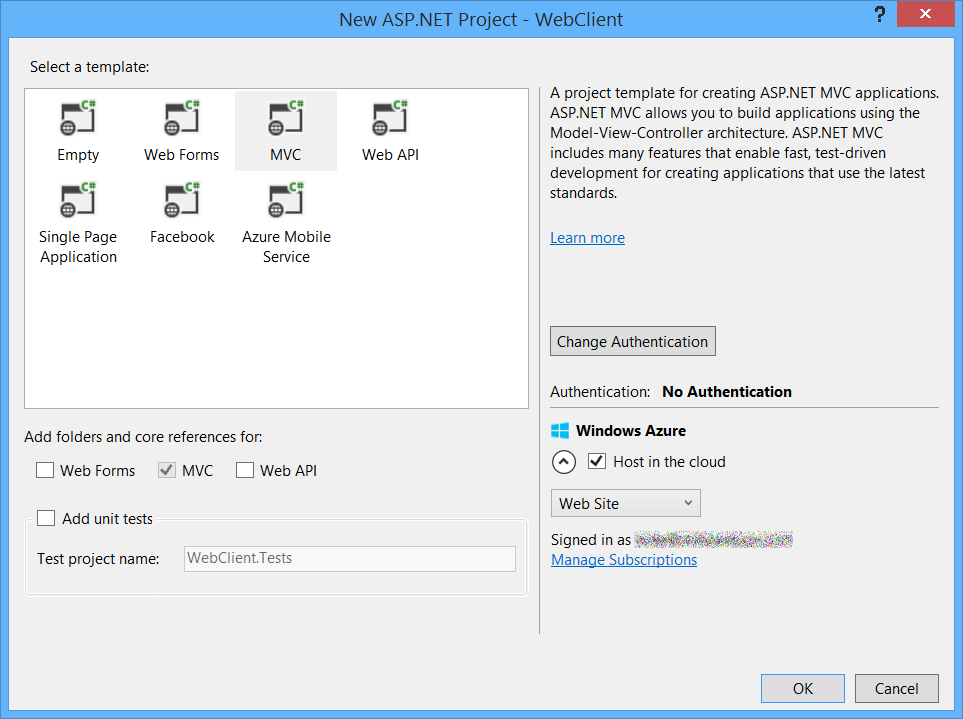
Create the WebClient Project
Create another ASP.NET Web Application project and select the MVC project template. Optionally, select Change Authentication > No Authentication. You don't need authentication for this tutorial.
In Solution Explorer, open the file Views/Home/Index.cshtml. Replace the code in this file with the following:
<div><selectid="method"><optionvalue="get">GET</option><optionvalue="post">POST</option><optionvalue="put">PUT</option></select><inputtype="button"value="Try it"onclick="sendRequest()"/><spanid='value1'>(Result)</span></div>

@section scripts {
<script>// TODO: Replace with the URL of your WebService appvar serviceUrl ='http://mywebservice/api/test';function sendRequest(){var method = $('#method').val();

        $.ajax({
            type: method,
            url: serviceUrl
        }).done(function(data){
            $('#value1').text(data);}).error(function(jqXHR, textStatus, errorThrown){
            $('#value1').text(jqXHR.responseText || textStatus);});}</script>
}
For the serviceUrl variable, use the URI of the WebService app. Now run the WebClient app locally or publish it to another website.
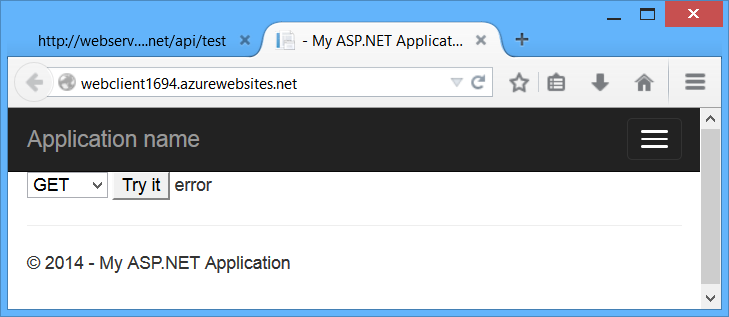
Clicking the “Try It” button submits an AJAX request to the WebService app, using the HTTP method listed in the dropdown box (GET, POST, or PUT). This lets us examine different cross-origin requests. Right now, the WebService app does not support CORS, so if you click the button, you will get an error.
If you watch the HTTP traffic in a tool like Fiddler, you will see that the browser does send the GET request, and the request succeeds, but the AJAX call returns an error. It’s important to understand that same-origin policy does not prevent the browser from sending the request. Instead, it prevents the application from seeing the response.

Enable CORS
Now let's enable CORS in the WebService app. First, add the CORS NuGet package. In Visual Studio, from the Tools menu, select Library Package Manager, then select Package Manager Console. In the Package Manager Console window, type the following command:
Install-PackageMicrosoft.AspNet.WebApi.Cors
This command installs the latest package and updates all dependencies, including the core Web API libraries. User the -Version flag to target a specific version. The CORS package requires Web API 2.0 or later.
Open the file App_Start/WebApiConfig.cs. Add the following code to the WebApiConfig.Register method.
usingSystem.Web.Http;namespaceWebService{publicstaticclassWebApiConfig{publicstaticvoidRegister(HttpConfiguration config){// New codeconfig.EnableCors();

            config.Routes.MapHttpRoute(
                name:"DefaultApi",
                routeTemplate:"api/{controller}/{id}",
                defaults:new{ id =RouteParameter.Optional});}}}
Next, add the [EnableCors] attribute to the TestController class:
usingSystem.Net.Http;usingSystem.Web.Http;usingSystem.Web.Http.Cors;namespaceWebService.Controllers{[EnableCors(origins:"http://mywebclient.azurewebsites.net", headers:"*", methods:"*")]publicclassTestController:ApiController{// Controller methods not shown...}}
For the origins parameter, use the URI where you deployed the WebClient application. This allows cross-origin requests from WebClient, while still disallowing all other cross-domain requests. Later, I’ll describe the parameters for [EnableCors] in more detail.
Do not include a forward slash at the end of the origins URL.
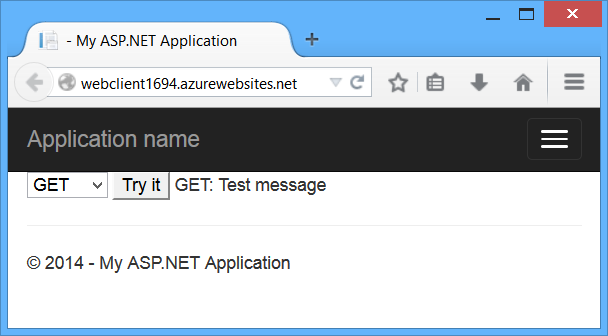
Redeploy the updated WebService application. You don't need to update WebClient. Now the AJAX request from WebClient should succeed. The GET, PUT, and POST methods are all allowed.
How CORS Works
This section describes what happens in a CORS request, at the level of the HTTP messages. It’s important to understand how CORS works, so that you can configure the [EnableCors] attribute correctly, and troubleshoot if things don’t work as you expect.
The CORS specification introduces several new HTTP headers that enable cross-origin requests. If a browser supports CORS, it sets these headers automatically for cross-origin requests; you don’t need to do anything special in your JavaScript code.
Here is an example of a cross-origin request. The “Origin” header gives the domain of the site that is making the request.
GET http://myservice.azurewebsites.net/api/test HTTP/1.1Referer: http://myclient.azurewebsites.net/Accept:*/*
Accept-Language: en-US
Origin: http://myclient.azurewebsites.net
Accept-Encoding: gzip, deflate
User-Agent: Mozilla/5.0 (compatible; MSIE 10.0; Windows NT 6.2; WOW64; Trident/6.0)
Host: myservice.azurewebsites.net
If the server allows the request, it sets the Access-Control-Allow-Origin header. The value of this header either matches the Origin header, or is the wildcard value “*”, meaning that any origin is allowed.
HTTP/1.1200 OK
Cache-Control:no-cache
Pragma:no-cache
Content-Type: text/plain; charset=utf-8Access-Control-Allow-Origin: http://myclient.azurewebsites.netDate:Wed,05Jun201306:27:30 GMT
Content-Length:17

GET:Test message
If the response does not include the Access-Control-Allow-Origin header, the AJAX request fails. Specifically, the browser disallows the request. Even if the server returns a successful response, the browser does not make the response available to the client application.
Preflight Requests
For some CORS requests, the browser sends an additional request, called a “preflight request”, before it sends the actual request for the resource.
The browser can skip the preflight request if the following conditions are true:
- The request method is GET, HEAD, or POST, and
- The application does not set any request headers other than Accept, Accept-Language, Content-Language, Content-Type, or Last-Event-ID, and
- The Content-Type header (if set) is one of the following:
- application/x-www-form-urlencoded
- multipart/form-data
- text/plain
The rule about request headers applies to headers that the application sets by calling setRequestHeader on the XMLHttpRequest object. (The CORS specification calls these “author request headers”.) The rule does not apply to headers the browser can set, such as User-Agent, Host, or Content-Length.
Here is an example of a preflight request:
OPTIONS http://myservice.azurewebsites.net/api/test HTTP/1.1Accept:*/*
Origin: http://myclient.azurewebsites.net
Access-Control-Request-Method: PUTAccess-Control-Request-Headers: accept, x-my-custom-header
Accept-Encoding: gzip, deflate
User-Agent: Mozilla/5.0 (compatible; MSIE 10.0; Windows NT 6.2; WOW64; Trident/6.0)
Host: myservice.azurewebsites.net
Content-Length: 0
The pre-flight request uses the HTTP OPTIONS method. It includes two special headers:
- Access-Control-Request-Method: The HTTP method that will be used for the actual request.
- Access-Control-Request-Headers: A list of request headers that the application set on the actual request. (Again, this does not include headers that the browser sets.)
Here is an example response, assuming that the server allows the request:
HTTP/1.1200 OK
Cache-Control:no-cache
Pragma:no-cache
Content-Length:0Access-Control-Allow-Origin: http://myclient.azurewebsites.netAccess-Control-Allow-Headers: x-my-custom-headerAccess-Control-Allow-Methods: PUTDate:Wed,05Jun201306:33:22 GMT
The response includes an Access-Control-Allow-Methods header that lists the allowed methods, and optionally an Access-Control-Allow-Headers header, which lists the allowed headers. If the preflight request succeeds, the browser sends the actual request, as described earlier.
Scope Rules for [EnableCors]
You can enable CORS per action, per controller, or globally for all Web API controllers in your application.
Per Action
To enable CORS for a single action, set the [EnableCors] attribute on the action method. The following example enables CORS for the GetItemmethod only.
publicclassItemsController:ApiController{publicHttpResponseMessageGetAll(){...}[EnableCors(origins:"http://www.example.com", headers:"*", methods:"*")]publicHttpResponseMessageGetItem(int id){...}publicHttpResponseMessagePost(){...}publicHttpResponseMessagePutItem(int id){...}}
Per Controller
If you set [EnableCors] on the controller class, it applies to all the actions on the controller. To disable CORS for an action, add the[DisableCors] attribute to the action. The following example enables CORS for every method except PutItem.
[EnableCors(origins:"http://www.example.com", headers:"*", methods:"*")]publicclassItemsController:ApiController{publicHttpResponseMessageGetAll(){...}publicHttpResponseMessageGetItem(int id){...}publicHttpResponseMessagePost(){...}[DisableCors]publicHttpResponseMessagePutItem(int id){...}}
Globally
To enable CORS for all Web API controllers in your application, pass an EnableCorsAttribute instance to the EnableCors method:
publicstaticclassWebApiConfig{publicstaticvoidRegister(HttpConfiguration config){var cors =newEnableCorsAttribute("www.example.com","*","*");
        config.EnableCors(cors);// ...}}
If you set the attribute at more than one scope, the order of precedence is:
- Action
- Controller
- Global
Set the Allowed Origins
The origins parameter of the [EnableCors] attribute specifies which origins are allowed to access the resource. The value is a comma-separated list of the allowed origins.
[EnableCors(origins:"http://www.contoso.com,http://www.example.com",
    headers:"*", methods:"*")]
You can also use the wildcard value “*” to allow requests from any origins.
Consider carefully before allowing requests from any origin. It means that literally any website can make AJAX calls to your web API.
// Allow CORS for all origins. (Caution!)[EnableCors(origins:"*", headers:"*", methods:"*")]
Set the Allowed HTTP Methods
The methods parameter of the [EnableCors] attribute specifies which HTTP methods are allowed to access the resource. To allow all methods, use the wildcard value “*”. The following example allows only GET and POST requests.
[EnableCors(origins:"http://www.example.com", headers:"*", methods:"get,post")]publicclassTestController:ApiController{publicHttpResponseMessageGet(){...}publicHttpResponseMessagePost(){...}publicHttpResponseMessagePut(){...}}
Set the Allowed Request Headers
Earlier I described how a preflight request might include an Access-Control-Request-Headers header, listing the HTTP headers set by the application (the so-called “author request headers”). The headers parameter of the [EnableCors] attribute specifies which author request headers are allowed. To allow any headers, set headers to “*”. To whitelist specific headers, set headers to a comma-separated list of the allowed headers:
[EnableCors(origins:"http://example.com",
    headers:"accept,content-type,origin,x-my-header", methods:"*")]
However, browsers are not entirely consistent in how they set Access-Control-Request-Headers. For example, Chrome currently includes “origin”; while FireFox does not include standard headers such as “Accept”, even when the application sets them in script.
If you set headers to anything other than “*”, you should include at least “accept”, “content-type”, and “origin”, plus any custom headers that you want to support.
Set the Allowed Response Headers
By default, the browser does not expose all of the response headers to the application. The response headers that are available by default are:
- Cache-Control
- Content-Language
- Content-Type
- Expires
- Last-Modified
- Pragma
The CORS spec calls these simple response headers. To make other headers available to the application, set the exposedHeaders parameter of[EnableCors].
In the following example, the controller’s Get method sets a custom header named ‘X-Custom-Header’. By default, the browser will not expose this header in a cross-origin request. To make the header available, include ‘X-Custom-Header’ in exposedHeaders.
[EnableCors(origins:"*", headers:"*", methods:"*", exposedHeaders:"X-Custom-Header")]publicclassTestController:ApiController{publicHttpResponseMessageGet(){var resp =newHttpResponseMessage(){Content=newStringContent("GET: Test message")};
        resp.Headers.Add("X-Custom-Header","hello");return resp;}}
Passing Credentials in Cross-Origin Requests
Credentials require special handling in a CORS request. By default, the browser does not send any credentials with a cross-origin request. Credentials include cookies as well as HTTP authentication schemes. To send credentials with a cross-origin request, the client must setXMLHttpRequest.withCredentials to true.
Using XMLHttpRequest directly:
var xhr =newXMLHttpRequest();
xhr.open('get','http://www.example.com/api/test');
xhr.withCredentials =true;
In jQuery:
$.ajax({
    type:'get',
    url:'http://www.example.com/api/test',
    xhrFields:{
        withCredentials:true}
In addition, the server must allow the credentials. To allow cross-origin credentials in Web API, set the SupportsCredentials property to true on the [EnableCors] attribute:
[EnableCors(origins:"http://myclient.azurewebsites.net", headers:"*",
    methods:"*",SupportsCredentials=true)]
If this property is true, the HTTP response will include an Access-Control-Allow-Credentials header. This header tells the browser that the server allows credentials for a cross-origin request.
If the browser sends credentials, but the response does not include a valid Access-Control-Allow-Credentials header, the browser will not expose the response to the application, and the AJAX request fails.
Be very careful about setting SupportsCredentials to true, because it means a website at another domain can send a logged-in user’s credentials to your Web API on the user’s behalf, without the user being aware. The CORS spec also states that setting origins to "*" is invalid ifSupportsCredentials is true.
Custom CORS Policy Providers
The [EnableCors] attribute implements the ICorsPolicyProvider interface. You can provide your own implementation by creating a class that derives from Attribute and implements ICorsProlicyProvider.
[AttributeUsage(AttributeTargets.Method|AttributeTargets.Class,AllowMultiple=false)]publicclassMyCorsPolicyAttribute:Attribute,ICorsPolicyProvider{privateCorsPolicy _policy;publicMyCorsPolicyAttribute(){// Create a CORS policy.
        _policy =newCorsPolicy{AllowAnyMethod=true,AllowAnyHeader=true};// Add allowed origins.
        _policy.Origins.Add("http://myclient.azurewebsites.net");
        _policy.Origins.Add("http://www.contoso.com");}publicTask<CorsPolicy>GetCorsPolicyAsync(HttpRequestMessage request){returnTask.FromResult(_policy);}}
Now you can apply the attribute any place that you would put [EnableCors].
[MyCorsPolicy]publicclassTestController:ApiController{..//
For example, a custom CORS policy provider could read the settings from a configuration file.
As an alternative to using attributes, you can register an ICorsPolicyProviderFactory object that creates ICorsPolicyProvider objects.
publicclassCorsPolicyFactory:ICorsPolicyProviderFactory{ICorsPolicyProvider _provider =newMyCorsPolicyProvider();publicICorsPolicyProviderGetCorsPolicyProvider(HttpRequestMessage request){return _provider;}}
To set the ICorsPolicyProviderFactory, call the SetCorsPolicyProviderFactory extension method at startup, as follows:
publicstaticclassWebApiConfig{publicstaticvoidRegister(HttpConfiguration config){
        config.SetCorsPolicyProviderFactory(newCorsPolicyFactory());
        config.EnableCors();// ...}}
Browser Support
The Web API CORS package is a server-side technology. The user's browser also needs to support CORS. Fortunately, the current versions of all major browsers include support for CORS.
Internet Explorer 8 and Internet Explorer 9 have partial support for CORS, using the legacy XDomainRequest object instead of XMLHttpRequest. For more information, see XDomainRequest - Restrictions, Limitations and Workarounds.


相关推荐
ASP.NET WebApi跨域请求的配置引用dll文件,完美实现了跨域请求问题。
Web API跨域的方法有很多,这里给出最简单而又最实用的一种。希望可以帮到您。Web API跨域的方法有很多,这里给出最简单而又最实用的一种。希望可以帮到您。
通俗易懂的实现ASP.NET WebApi跨域请求配置,项目中有详细注释,希望能够帮到你,欢迎前来下载。
webapi跨域小demon,适合刚学者,没什么技术难点,自己测试过,跨域成功 同源策略:出于安全考虑,浏览器会限制脚本中发起的跨站请求,浏览器要求JavaScript或Cookie只能访问同域下的内容。 正是由于这个原因,...
同源策略:出于安全考虑,浏览器会限制脚本中发起的跨站请求,浏览器要求JavaScript或Cookie只能访问同域下的内容。...因为我们的WebApi和MVC是两个不同的项目,所以运行起来之后就存在上面说的跨域的问题。
但是在使用API的时候总会遇到跨域请求的问题,特别各种APP万花齐放的今天,API的跨域请求是不能避免的。 在默认情况下,为了防止CSRF跨站的伪造攻击(或者是 javascript的同源策略(Same-Origin Policy)),一个网页...
由于项目是前后端分离,API接口与Web前端 部署在不同站点当中,因此在前文当中WebApi Ajax 跨域请求解决方法(CORS实现)使用跨域处理方式处理而不用Jsonp的方式。 但是在一段时间后,发现一个很奇怪的问题,每次...
主要介绍了支持Ajax跨域访问ASP.NET Web Api 2(Cors)的示例教程,需要的朋友可以参考下
需要通过服务器端设置响应头、正确响应options请求,正确设置 JavaScript端需要设置的headers信息方能实现,本文介绍的非常详细,具有参考借鉴价值,需要的朋友可以参考下
因为我们这边一般情况下一个webapi会有多个网站、小程序、微信公众号等访问,所以这样设置是没有问题的。但是……如果其中一个网站需要用到cookie或者session的时候, Access-Control-Allow-Origin如果还是设置成“*...
Allow-Control-Allow-Origin: * 1.0.3 用于APP开发时候的 webapi跨域请求。
主要给大家介绍了关于ASP.NET WebAPI2复杂请求跨域设置的相关资料,文中通过示例代码介绍的非常详细,对大家的学习或者使用ASP.NET具有一定的参考学习价值,需要的朋友们下面来一起学习学习吧
服务端使用Web Api,界面通过Ajax调用,处理跨域.....................................................................
本文主要介绍了ASP.Net WebAPI与Ajax进行跨域数据交互时Cookies数据传递的相关知识。具有很好的参考价值。下面跟着小编一起来看下吧
C#进阶系列——WebApi 路由机制剖析:你准备好了吗? ................................................................................................... 3 一、MVC和WebApi路由机制比较 .......................
求解决办法 代码如下: ajax{ url :“http://xxxx/app”...求方法 您可能感兴趣的文章:跨域请求之jQuery的ajax jsonp的使用解惑AJAX跨域请求json数据的实现方法jQuery.ajax 跨域请求webapi设置headers的解决方案JQuer